We have come to part five in this tutorial series on how to start a blog. Today, we’ll talk about installing WordPress and activating your theme, the final steps needed to get your self-hosted blog up and running.
So far, we have gone over:
- the pros and cons of free vs. paid blogs
- how to set up a free blog on WordPress
- how to get a domain name and web hosting
- selecting a theme
Note: The tutorial in this post assumes you followed the steps in the earlier posts and either bought your domain name through GoDaddy and signed up with BigScoots or Bluehost for hosting. If you got your domain name through your web host, you can skip the part about changing the nameservers.
Change the Nameservers
Note: If you got your domain name directly through your hosting company, skip this step.
As soon as you sign up with BigScoots or Bluehost, they send you a welcome email which among other things include the names of two nameservers. Keep this, you’ll need it. Log into your account at GoDaddy, click on Domains and in the list of names that shows up (if you own more than one), click the domain name you want to change nameservers for. You will get to a page with some information about your domain, and if you scroll down to the bottom of the page, you’ll see a link that says Manage DNS. Click on that. This opens a new window, and here, under Nameservers, click on Change. Select “Custom” for nameserver type and paste in the nameserver names your web host sent you and click Save. It can take a little while before this goes into effect, so you can log out of GoDaddy once you’ve done this.
Installing WordPress
By now, hopefully the nameserver change has taken effect. You’ll know it did if you can log into your cPanel. The cPanel is the control center of the inner workings of your site and you log into it by typing www.yourdomainname.com/cpanel in your URL window (obviously yourdomainname needs to be replaced with whatever your domain name is). If the nameservers have been changed, this will take you to a log in window, where you log in with the username and password you created when you registered at BigScoots or Bluehost.
Installing WordPress Using BigScoots cPanel (scroll down for Bluehost instructions)
- In the BigScoots cPanel, scroll down on the page until you see a heading called Softaculous Apps Installer. In that box, under Scripts, you’ll see a WordPress logo and the name WordPress.

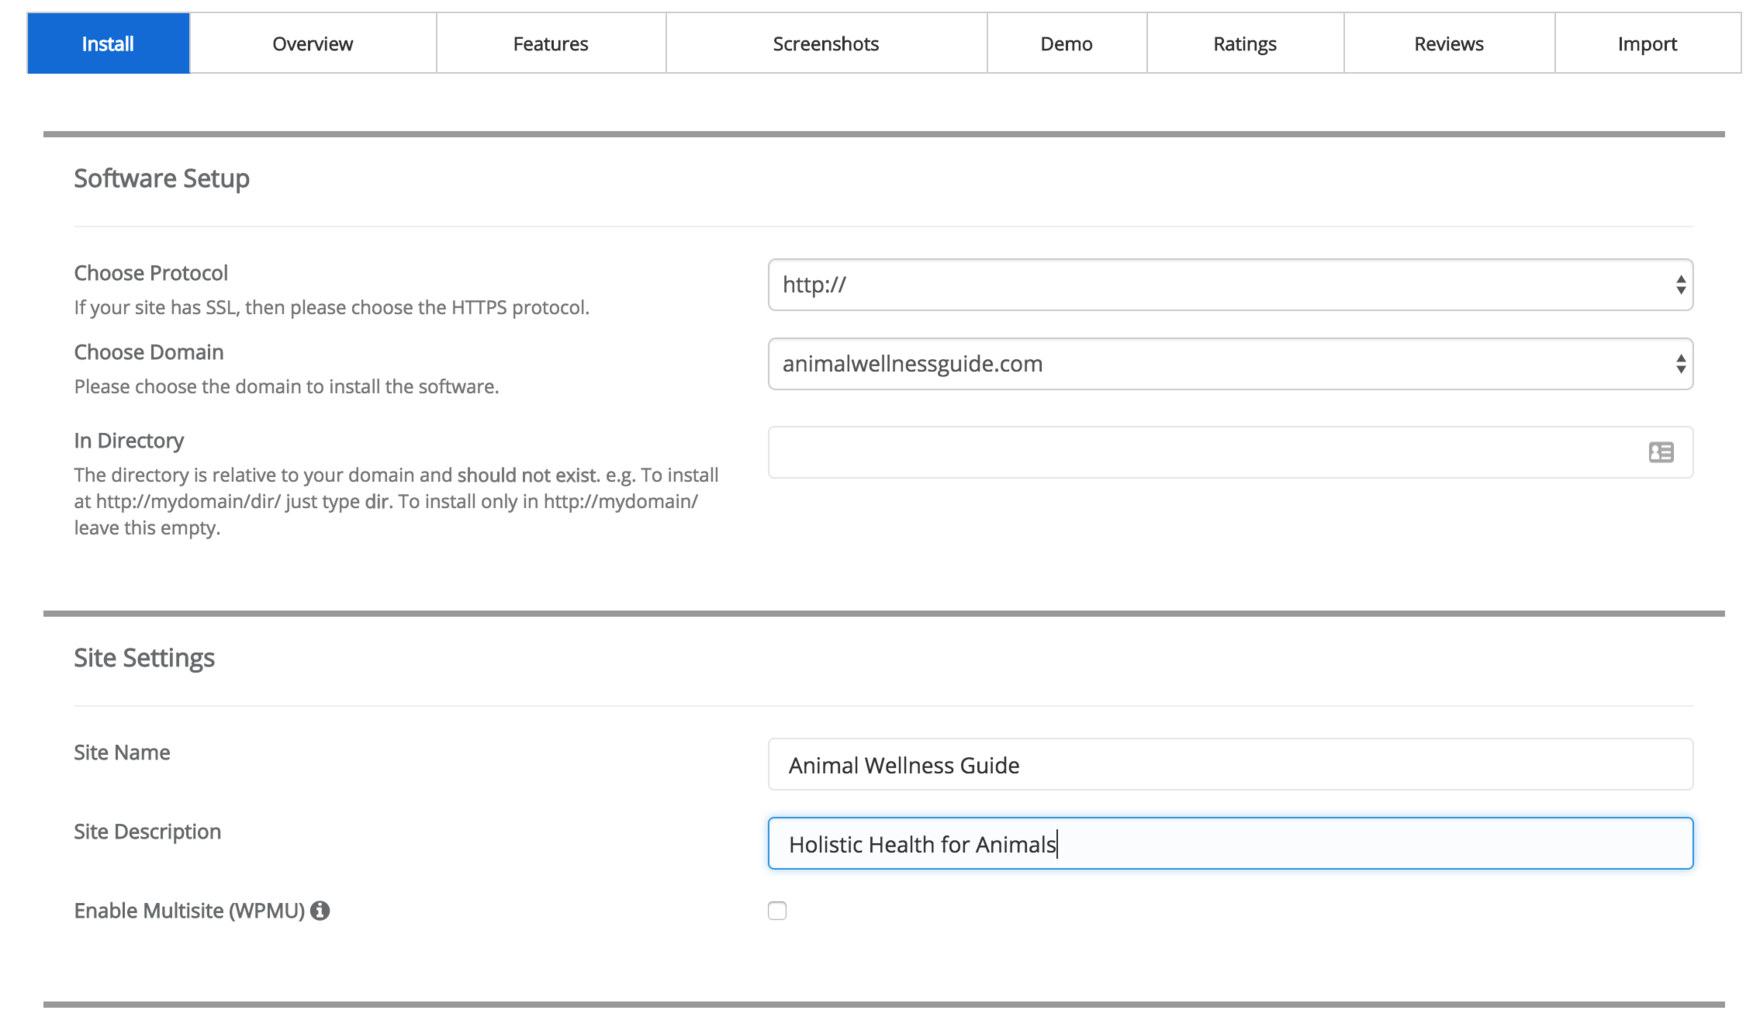
2. Click on that. In the next window, click on Install Now. This takes you to a new window where you need to fill out a number of fields:
In the Software Setup section, select the domain and leave the directory field blank.
In Site Settings, type in the name of your blog and a short description or tagline
In Admin account, type in an admin username (that is NOT “admin”, hackers will try that before anything else), create a password, and type in your email address. Make a note of your username and password – you’ll need them soon. Select a language.
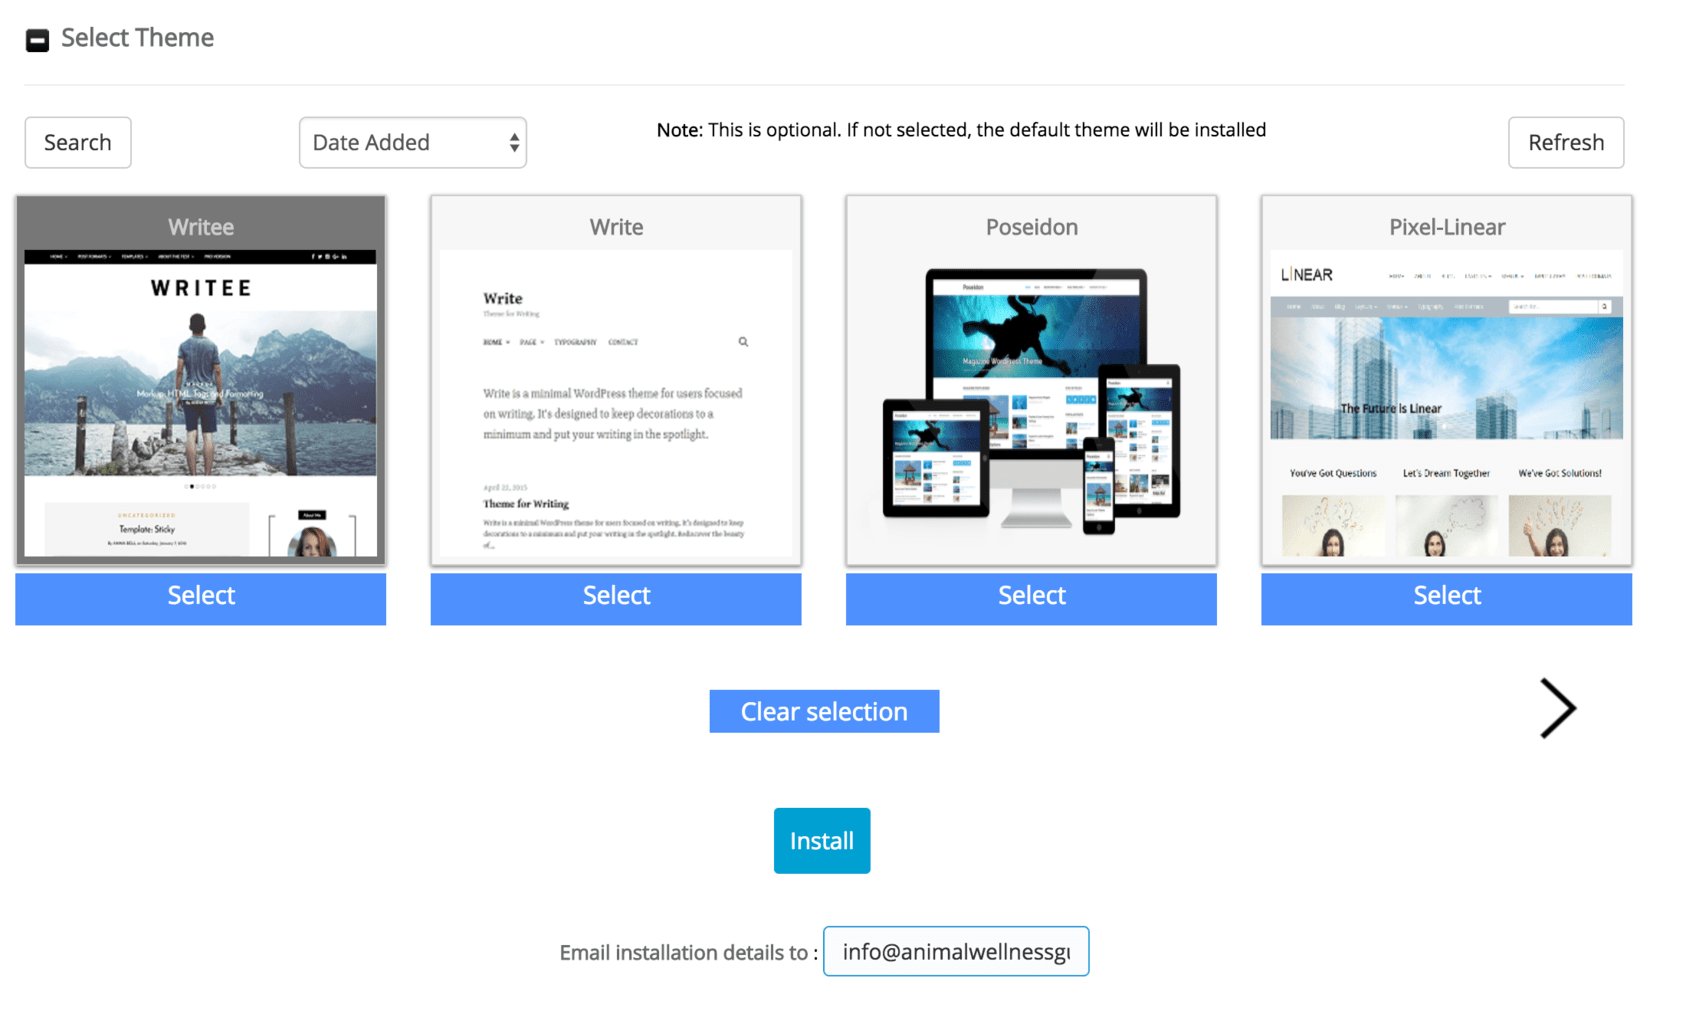
Scroll down and select a theme, just to have one in place for now. We will change it momentarily. Fill in your email address in the Email installation details to: field, it’s always a good idea to have the details. Then, click Install.
Installing WordPress On Bluehost’s cPanel
In the Bluehost cPanel:
- Scroll down to the Website section and select Install WordPress.
- Click the Install button.
- Choose the domain name to install it to.
- Under “Advanced options”, enter your site name, username and password for this new WordPress installation (again, make sure the username is NOT “admin”). Check the “Automatically create a new database for this installation” box, and that you have read the terms and conditions
- Click Install Now.
Don’t leave this window until the installation is complete, it should take around a minute or so, the site will tell you when it’s done.
That’s it! Once that’s done, you can make sure it worked by going into your browser and typing in your domain (www.yourdomainname.com) in the URL window. If all went according to plan, you will see your blog.
Installing Your Theme
The next step is to install your theme that you downloaded earlier (see How To Start A Blog Part IV: Selecting a Theme if you missed that post):
Log into your blog. You do this by typing in your blog address and /wp-admin in the URL window (so it would be www.yourdomainname.com/wp-admin) and enter the user name and password you used to set up WordPress in cPanel. This will bring you to your dashboard.
Click on “Appearance – Themes” in the menu on the left side of your blog. This brings you to a new window where you’ll see your currently active theme and several others. To switch to your new theme, click on Add New and in the new window that opens, click on Upload and upload the zip file with your theme from your computer. Once you have uploaded it, you can do a live preview, and if you like what you see, go ahead and activate it.
Once you’ve activated your new theme, there are a few little housekeeping chores to be done. Note that your site will be live while you’re doing this, so if you prefer to set things up behind the scenes, use a “coming soon” type page. I like the Ultimate Coming Soon & Maintenance Mode plugin from SeedProd – it’s what I used while working on this site; it looks great and it is really easy to set up and configure to your needs.
Settings
The first thing you want to do is to click on Settings (in the left side dashboard menu) and in the General Settings, type in the title of your blog, your tagline, the URL and address of your blog (unless it’s already there), your email address and your date and time format preferences. Click Save Changes.
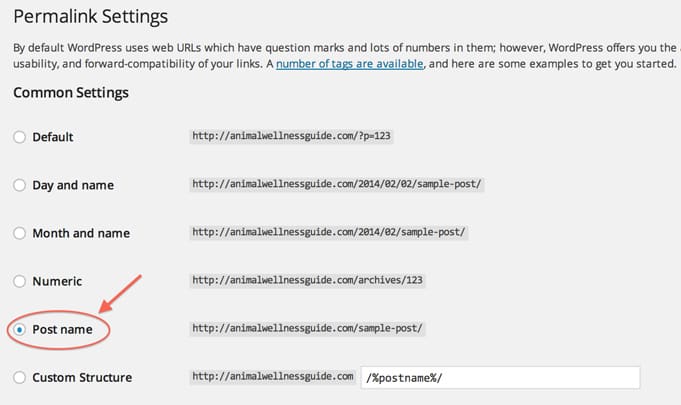
Then, in the left hand menu, click on “Permalinks” and make sure Post name is selected. This will make sure your posts have nice and “clean” URLs with your post title in the URL (instead of things like MyDomainName.com/?p=123). Once you’ve done that, click Save Changes.
In “Reading”, set things up the way you want them. If you are using your blog as a website, you want to make the front page a Static page, and if you are using it as a blog, select “Your latest posts”. You obviously want the search engines to find you, so make sure that the Search Engine Visibility box is not checked.
Click on “Writing” and select the options you want. They’re mostly a matter of preference, but one thing you want to make sure here is that your blog “pings”, so in the window on the bottom of the Writing settings, make sure it says http://rpc.pingomatic.com/. What that means is that every time you publish a new post, the search engines will be alerted that you posted something, which is a good thing. Click Save changes.
In “Discussion” you set your preferences for how comments are handled, so the settings here are really up to you. I prefer to approve comments before they’re posted because of spam, and I also select “Show Avatars”.
Even if your theme comes with good SEO built in, I recommend installing the Yoast SEO plugin. It comes with a LOT of valuable settings and tools. I have written about it more in depth in the Plugins post, but for now, go to Plugins and Add New and in the search window, type in seo. Yoast’s SEO is usually the first one on the list. Click on install now and then activate it. Once you do, you’ll see that an SEO listing shows up in your dashboard menu (far down, on the left). Click on each item to set it up.
That’s it! You’re ready to start blogging!
In coming posts, I will write about how to publish pages and posts, install plugins, and share some other useful tips and tricks.
For a complete list of the blogging products I use and recommend, see the Recommended Blogging Tools & Resources page.


